
A Rust driver crate for the ADXL355 digital accelerometer. This driver accepts an embedded-hal SPI interface and a GPIO OutputPin (for the chip select). It implements the Accelerometer Trait so you can easily obtain both raw sensor data and scaled-to-Standard-gravity sensor data.
The ADXL355 is one of the best three axis digital accelerometers that I know of. It has a noise floor of only 25 µg/√Hz. For example, the very popular MPU9250 Inertial Measurement Unit (IMU) specifies 300 µg/√Hz for its noise density. One order of magnitude higher.
Of course the ADXL355 is more expensive, but I think it hits a nice sweet spot between the low end IMUs and very high end and high cost MEMS accelerometers (with noise densities of around 7 µg/√Hz).

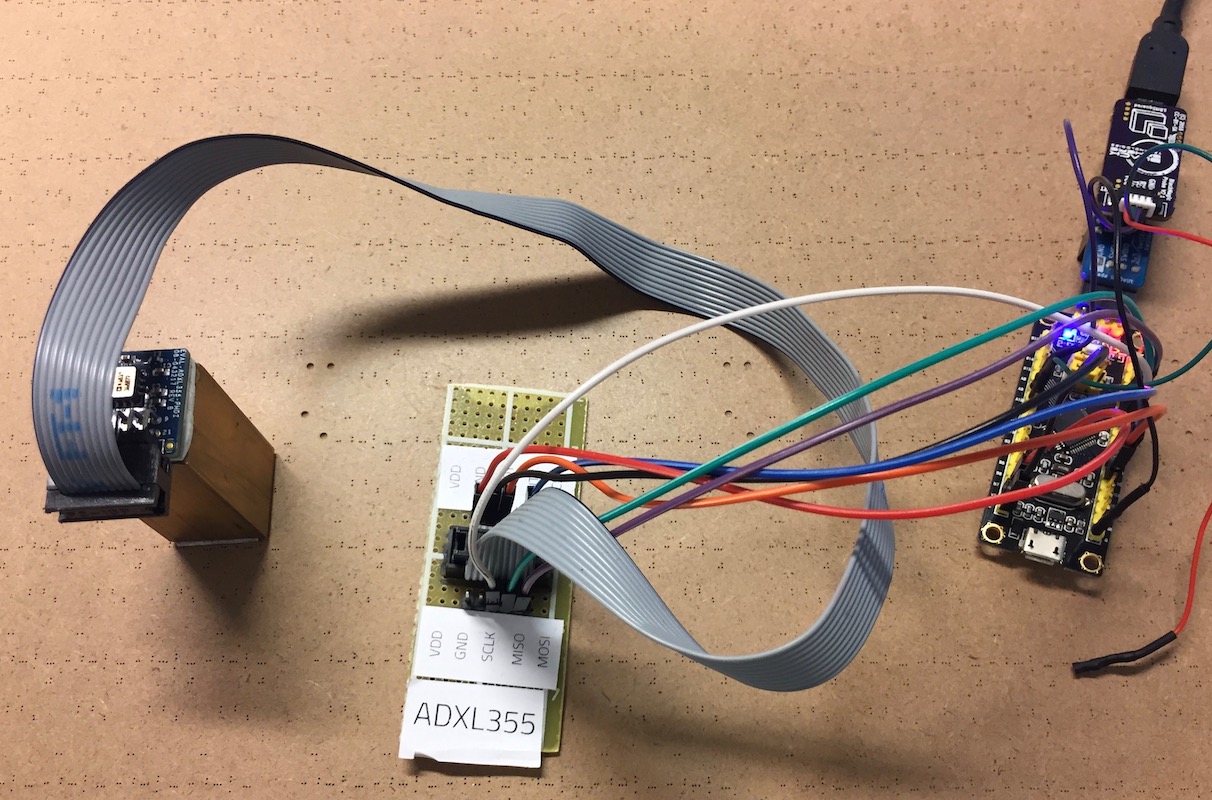
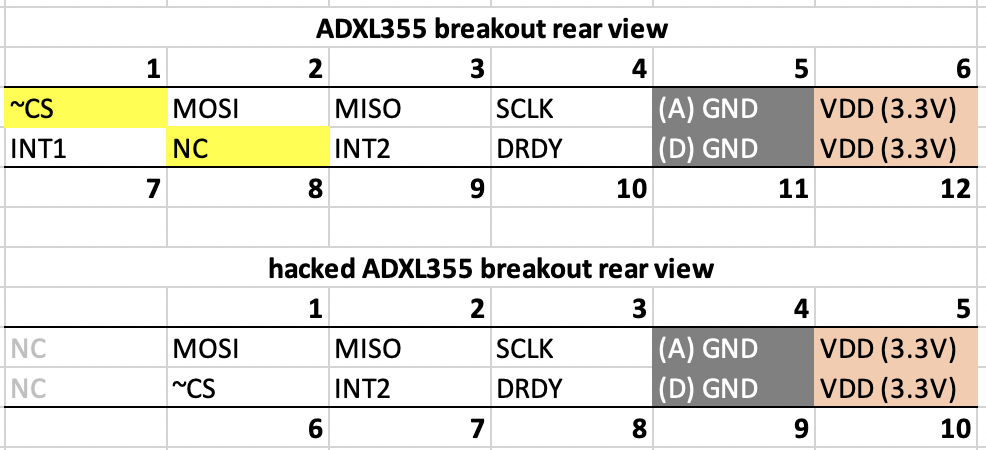
For this blogpost we make use of this breakout board.
It has a 2x6 pin header. We hacked it by shorting pin 1 to pin 8 so we could use a 10 strand flatcable that we had laying around. That means we lose the INT1 pin, but we’re not using it yet anyway.
The first step is to add the crate in your Cargo.toml. At the time of writing the latest version is 0.2.0.
|
To quickly get started with default settings you’ll only need to import
|
Adxl355 is used to create the driver instance, and Accelerometer needs to be used to get the trait in scope so we can use its API.
Let’s create the default driver and read a sample and send it over serial.
|
It is unlikely that the default settings match exactly with your project requirements. In the next example we will configure the sample rate, the measurement range and utilise the ADXL355’s data ready signal to trigger reading the data registers.
Since we’ll be looking at the serial data with our slow human eyes, we will select the slowest possible sample rate. We need to import the ODR_LPF enum. It is called ODR_LPF because it will configure both the Output Data Rate and the Low Pass Filter. Lower data rate means more filtering and less noise. According to the datasheet the slowest datarate is 3.906 Hz. So we’ll get about 4 samples a second.
For the measurement range we can choose between ±2g, ±4g and ±8g. If you have ever worked with accelerometers, you probably noticed that you always measure the gravity constant as an offset in the direct of the gravity. That means that we actually have to subtract 1g to get the effective range.
Let’s go for the ±4g mode since ±2g is default.
We apply these settings by creating a config object and changing its properties.
|
To use the data ready interrupt we need to configure the gpio pin connected to this external signal. How to do this differs per microcontroller and also per HAL crate. For the STM32F103 it is done as follows:
|
Then we poll the interrupt bit in the main loop and read the data when ready
|

For the complete code and more examples please see the example directory of the crate repository.
See the README for building and running instructions.

